이 글은 Firebase Authentication - Google Login 시 발생할 수 있는 에러를 해결하면서 마주칠 수 있는 사안에 대해 기술한 글입니다.

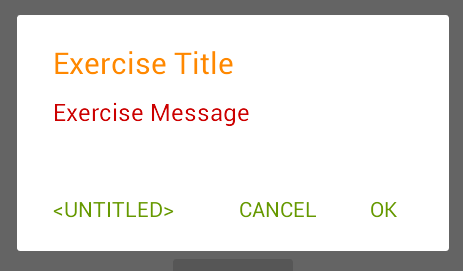
아래 그림은 Firebase Authentication SignIn 관련 코드를 추가했을 때 나오는 화면이며, SignIn 시 에러 코드를 발생시키며, 더 이상 진행되지 않을 때입니다.

UX 에서 딱히 어떤 에러 상황을 보여주지 않기 때문에, (로그인에 실패하였습니다! 팝업같은) 코드가 제대로 들어간 것인지 혹은 서버의 문제인 것인지 처음 닥쳤을 때는 조금 당황할 수 밖에 없습니다.

참고로 출처는 구글 코드랩 (https://firebase.google.com/codelabs/firebase-android?hl=ko#5) 입니다.

Firebase SignInActivity


0. 문제의 원인

Android SHA-1 FingerPrint 부재

앱을 플레이스토어에 올리려고 할 때 필요한 '나의 시그니처(사인)' 이 없어서 입니다.

<이건 내가 만든 거야 그러니깐 나중에 업데이트할 때도 이 사인을 보고 내가 한 게 맞을 때 업데이트 하라고!> 얘기해주는 것이조


1. 이제 시작인데, ...

처음 앱을 만들 때에는 보통 이런 사인 없이도 테스트해볼 수 있습니다.

왜냐하면, <안드로이드 스튜디오> 에서 기본 값을 넣어주기 때문입니다.


이 때 사용하는 키스토어는 .android/debug.keystore 입니다.

MS윈도우와 Mac 의 기본 저장위치가 조금 다르니 아래 코드를 참고하세요. storepass, alias, keypass 는 동일합니다.


keytool -list -v -keystore c:\Users\<%mylogin%>.android\debug.keystore" -alias androiddebugkey -storepass android -keypass android
keytool -list -v -keystore ~/.android/debug.keystore -alias androiddebugkey -storepass android -keypass android
Alias name: androiddebugkey
Creation date: 2023. 3. XX.
Entry type: PrivateKeyEntry
Certificate chain length: 1
Certificate[1]:
Owner: C=US, O=Android, CN=Android Debug
Issuer: C=US, O=Android, CN=Android Debug
Serial number: 1
Valid from: Fri Mar XX 16:57:34 KST 2023 until: Sun Mar XX 16:57:34 KST 2053
Certificate fingerprints:
	 SHA1: 3F:EA:C9:19:DC:AD:3E:EE:3F:C1:2B:BB:71:B8:84:10:
	 SHA256: D4:5D:DB:FA:A2:61:05:AF:EF:66:B8:61:A4:4F:10:89
Signature algorithm name: SHA1withRSA (weak)
Subject Public Key Algorithm: 2048-bit RSA key
Version: 1

Warning:
The certificate uses the SHA1withRSA signature algorithm which is considered a security risk.


firebase console(https://console.firebase.google.com/) 에서 프로젝트를 선택한 뒤, 프로젝트 설정을 선택합니다.

그리고 설정 화면에서 맨 아래로 내려가면, 내 앱> 앱 추가 를 선택하여 패키지명과 FingerPrint 값(위 코드를 실행시켰을 때 나오는) 을 입력해 주면 됩니다.


2. 이 시점에서 키스토어를 만드시는 것도 ...

Android Studio > Build > Generate Signed Bundle / Apk > Next > 중간에 Create New 버튼을 누르시면 키스토어를 만드실 수 있습니다.


그리고, 만들어진 keystore 에서 나온 FingerPrint 값을 Firestore 에 등록해 놓고, 아래와 같이 build.gradle 파일에서 해당 signingConfig 를 debug 에서 사용하는 것도 나쁘지 않은 방법입니다.

실제로 저도 실서비스에서만 발생하는 버그를 찾기위해서 아래와 같은 방법을 종종 사용하곤 합니다.


    buildTypes {
        debug {
            //signingConfig signingConfigs.release
        }
        release {
            signingConfig signingConfigs.release
            minifyEnabled false
            proguardFiles getDefaultProguardFile('proguard-android.txt'), 'proguard-rules.pro'
        }
    }

    signingConfigs {
        release {
            storeFile rootProject.file('key.store')
            keyAlias 'key1234'
            keyPassword '123456'
            storePassword '123456'
        }
    }


3. 덧붙임

테스트 중이 "Code : 7" 에러가 나왔던 적이 있었던 것 같은데, 정확하지는 않지만, SignUp 이 제대로 되지 않아서 발생했던 것으로 기억합니다. 참고하시길~


'Android' 카테고리의 다른 글

Android targetSdkVersion=30, queryIntentActivities() 문제  (0) 2022.01.10
Gson - Android Proguard 문제  (0) 2020.11.12
Android Studio - Database Inspector  (0) 2020.11.04
Android AlertDialog Style 변경  (0) 2020.08.05
Android Custom Lint  (0) 2020.07.28


발단


Google PlayStore 의 최근 요구 사항에 따라 ( https://developer.android.com/distribute/best-practices/develop/target-sdk?hl=ko ) 최근 App targetSdkVersion 을 30으로 올리는 작업을 진행했습니다.


2021년 8월부터 신규 앱은 다음 요건을 충족해야 합니다.
...
 * API 수준 30(Android 11) 이상을 타겟팅하고 동작 변경사항에 맞게 조정합니다.
...


진행하다 보니, 평소에 잘 동작하던 queryIntentActivities 가 제대로 동작하지 않았습니다.


개요


PackageManager.queryIntentActivities 는 보통 암시적 Intent ,(이를 테면, URL 을 가지고 Web Browser 로 넘기기전에 적당한 Intent ), 를 실행하는 App 을 선택하기 위해, 주로 사용하는 API 였습니다.


안드로이드 예전 버전에서 startActivity 를 실행했을 때, 생길 수 있는 선택창을 없애기 위한 방법 중 하나였습니다.

이를  테면, 브라우저 앱이 크롬, 파이어폭스, 제조사 브라우저 등 여러개 설치되어 있다고 할 때,

URL - ACTION_VIEW Intent 로 startActivity 를 실행하기 전, 선택가능한 Activity 중 하나를 코드상에서 선택하게 함으로,

사용자에게 어떤 브라우저를 사용할 것인지 확인을 받는 동선을 없애버려서, 좀 더 편하게 사용하게 하려는 의도이기도 합니다.


혹은 startActivity 를 사용할 때, ActivityNotFoundException 을 회피하기 위해 사용하기도 했습니다.

아래 코드 처럼 try-catch 로 처리하거나, Intent.resolveActivity 를 사용하는 방법도 있긴하지만,

queryIntentActivities() 결과 값 크기로 구분하기도 했습니다.


    try {
        startActivity(intent)
    } catch (e: ActivityNotFoundException) {

    }


이 API 를 잘 이용해서, action = MAIN, category = LAUNCHER 로 인텐트 필터로 사용하면, 앱 관리자 같은 앱을 만들 수도 있습니다.


좀 더 깊숙히


하지만, targetSdkVersion = 30 부터는 이런 동작이 쉽지 않게 되었습니다.

예를 들어, 아래와 같이 jpeg image 를 보내는 intent 를 만들었다고 가정하면,...


fun Context.queryIntentActivitiesTest() {
    val jpegIntent = Intent(Intent.ACTION_SEND).apply {
        this.setDataAndType(Uri.parse("file://a"), "image/jpeg")
    }
    val query = this.packageManager.queryIntentActivities(jpegIntent, 0)
    val system = query.filter { it.activityInfo.applicationInfo.flags and ApplicationInfo.FLAG_SYSTEM != 0 }
    val other = query.filter { it.activityInfo.applicationInfo.flags and ApplicationInfo.FLAG_SYSTEM == 0 }
    Log.d("Test", "jpegIntent queryIntentActivities = total, SYSTEM, NON-SYSTEM " +
            "${query.size}, ${system.size}, ${other.size}"
    )
}


이 결과는 아래 표와 같이 나옵니다.

  Total System Other
targetSdkVersion = 29 42 14 28
targetSdkVersion = 30 15 7 8


즉, targetSdkVersion 을 변경한 것으로 queryIntentActivities 로 반환된 결과 값의 차이가 생기고,

이는 실행할 수 있는 Activity 의 갯수가 줄어든다는 것입니다.


물론, 단순히 startActivity 만 사용하는 코드에서는 전혀 문제가 없지만, 위에서 언급했던 것처럼, 특정 App 이 직접 실행되도록 하는 코드를 작성할 경우에는 targetSdkVersion 만 변경한 것으로도 이전과 다른 동작을 하게 될 수가 있습니다.


구글이 targetSdkVersion = 30 에서 이런 제한을 둔 것은 보안상의 이유라고 보여집니다.

위에서도  언급했지만, queryIntentActivities() 를 잘 이용하면, <앱 관리자> 유형의 앱을 개발할 수 있습니다.

즉, 이 API 를 이용하면, 사용자 단말에 설치되어 있는 앱 목록을 알 수 있다는 것이고, 이를 다른 용도로 앱이 이용할 가능성이 있기 때문에, API 이용에 제한을 두기 시작했다는 것으로 볼 수 있습니다.


해결방법


만약, targetSdkVersion = 29 일 때와 동일하게 동작하게 하려면,

아래와 같이 AndroidManifest.xml 파일에 아래와 같이 <queries></queries> 를 추가해주어야 합니다.


<manifest>
    <queries>
        <intent>
            <action android:name="android.intent.action.SEND" />
            <data android:mimeType="image/jpeg" />
        </intent>
    </queries>
    
    <application>
    </application>
</manifest>


혹은 아래와 같은 permission 을 추가해 주어야 합니다. 하지만, 이 방법은 권장?, 추천?하지 않습니다.


<manifest>
	<uses-permission android:name="android.permission.QUERY_ALL_PACKAGES" />
	<application>
	</application>
</manifest>


왜냐하면, <앱관리자> 같은 특정한 성격의 앱이 아니고서는 플레이스토어 심사를 통과하지 못 할 가능성이 높기 때문입니다.

( https://support.google.com/googleplay/android-developer/answer/10158779?hl=ko  )


위 문서에는 아래와 같이 언급되어 있습니다.


앱이 QUERY_ALL_PACKAGES 권한의 허용되는 용도에 관한 요구사항을 충족할 경우, Play Console의 권한 선언 양식을 사용해 이 권한 및 위험성이 높은 기타 모든 권한을 선언해야 합니다.

정책 요구사항을 충족하지 못하거나 권한 선언 양식을 제출하지 않으면 앱이 Google Play에서 삭제될 수 있습니다.

중요: 앱에서 제한된 권한을 사용하는 방식을 변경하려면 정확하게 업데이트된 정보로 요청을 수정해야 합니다. 이러한 권한을 사기성 및 선언되지 않은 용도로 사용하면 앱이 정지되거나 개발자 계정이 해지될 수 있습니다.


참고한 문서


1. Google Play의 타겟 API 수준 요구사항 충족하기

  -  https://developer.android.com/distribute/best-practices/develop/target-sdk?hl=ko

2. 패키지 공개 상태 관리

  -   https://developer.android.com/training/basics/intents/package-visibility

3. 폭넓은 패키지(앱) 가시성 (QUERY_ALL_PACKAGES) 권한 사용

  -   https://support.google.com/googleplay/android-developer/answer/10158779?hl=ko 


#Android,#PackageManager,#targetSdkVersion=30,#queryIntentActivities

'Android' 카테고리의 다른 글

Firebase Authentication ‘Code:10, message:10’ 에러 해결  (0) 2023.04.04
Gson - Android Proguard 문제  (0) 2020.11.12
Android Studio - Database Inspector  (0) 2020.11.04
Android AlertDialog Style 변경  (0) 2020.08.05
Android Custom Lint  (0) 2020.07.28

Gson 은 JSONObject 를 파싱해서 객체로 만들어 사용할 때, 파싱하는 번거로움을 줄여주는 유용한 라이브러리입니다.


Gson 은 상당히 오래전 부터 사용해오던 라이브러리입니다.

개발을 하면서 처음 Gson 이란 놈을 만났던 것은 2010년대 초반 정도였던 것으로 기억하는데,

Github 의 정보를 보니 1.0 이 릴리즈 된것이 2008년이니 최소한 10년은 넘은 라이브러리입니다.


github.com/google/gson


google/gson

A Java serialization/deserialization library to convert Java Objects into JSON and back - google/gson

github.com


Gson 과 관련된 글들이 많이 있지만, 간단한 코드를 보는 것이 가장 유용합니다.

아래 코드를 보면, Person 이라는 객체의 멤버 이름을 JSONObject 의 Key 값으로  치환해서 String 으로 변환해 줍니다.

거꾸로 이 String 을 JSONObject 로 변환할 수 있다면, 다시, 이전의 Person 이라는 객체로 만들어 줄 수도 있습니다.


fun main(args: Array<String>) {
    val p1 = Person("John", 10)
    val json: String = GsonBuilder().create().toJson(p1)
    println(json)

    val p2: Person = GsonBuilder().create().fromJson<Person>(json, Person::class.java)
    println("name=${p2.name}, age=${p2.age}")
}

class Person(val name: String, val age: Int)

//----- Result -----
{"name":"John","age":10}
name=John, age=10


어떻게 이렇게 만들 수 있을까? 가 궁금해 집니다.

라이브러리 내부의 코드들은 더 복잡하고 많은 내용들을 담고 있지만, 간단하게 그 원리를 파악해보기 위해, 아래와 같은 코드를 실행해 보면, 어느 정도 짐작해 볼 수 있습니다.

코드에서는 클래스 내부에 선언된 필드들의 이름과 타입을 파악할 수 있는데, 이를 이용하면, 라이브러리를 사용하는 사람이 어떤 종류의 객체, 클래스를 생성하건 이를 이용해서 JSONObject 로 변환해 줄 수 있는 코드를 만들 수 있습니다.

- 물론, 아래와 같이 간단한 객체의 경우는 저 정도의 코드 만으로도 변환이 가능하겠지만, 실제 라이브러리의 코드를 참조하면, 더 많은 내용들이 담겨져 있고, 한 편으로는 더 많은 공부가 필요 하기도 합니다.


fun main(args: Array<String>) {
    val c : Class<*> = Person::class.java
    for(d in c.declaredFields){
        println("Field Name = ${d.name}, Type = ${d.type}")
    }
}

class Person(val name: String, val age: Int)

// ---- Result ----
Field Name = name, Type = class java.lang.String
Field Name = age, Type = int


이 글을 쓰게 된 것은 제목에서도 보이지만, 단순히 Gson 에 대해 소개하거나 설명하기 위한 글이 아닙니다.

Gson 이 Android 와 만났을 때, 그리고, Android 에서 난독화되었을 때의 문제를 풀어내기 위해서 입니다.

Android 의 proguard 는 클래스 필드명을 모조리 바꾸어 버립니다.

이를 테면, 위의 코드에서 사용했던 Person 같은 객체의 이름과 필드의 이름들은 아래와 같이 변경됩니다.


class A(val a: String, val b: Int)
// class Person(val name: String, val age: Int)


즉, 이런 식으로 바뀌면, 처음 {"name":"John","age":10} 으로 출력되었던 결과물은 {"a":"John","b":10} 으로 출력될 것입니다.

거꾸로 JSONOjbect 스트링을 객체로 변환하는 것은 당연히 실패합니다.

여기서 약간 난해한 상황은 기본 값을 갖는 객체가 생성되지 Error를 발생시킨다던가 하지 않습니다.

그래서, build variant 를 debug 로 실행할 때는 문제가 없었지만, release 로 실행할 때는 전혀 예상할 수 없는 결과가 나오게 되면 매우 당황하게 됩니다.


물론, github/gson android 예제로 부터 간단히 답을 찾을 수 있습니다.

(github.com/google/gson/blob/master/examples/android-proguard-example/proguard.cfg) 파일을 참조하면, 다음과 같습니다.


##---------------Begin: proguard configuration for Gson  ----------
# Gson uses generic type information stored in a class file when working with fields. Proguard
# removes such information by default, so configure it to keep all of it.
-keepattributes Signature

# For using GSON @Expose annotation
-keepattributes *Annotation*

# Gson specific classes
-dontwarn sun.misc.**
#-keep class com.google.gson.stream.** { *; }

# Application classes that will be serialized/deserialized over Gson
-keep class com.google.gson.examples.android.model.** { <fields>; }

# Prevent proguard from stripping interface information from TypeAdapter, TypeAdapterFactory,
# JsonSerializer, JsonDeserializer instances (so they can be used in @JsonAdapter)
-keep class * extends com.google.gson.TypeAdapter
-keep class * implements com.google.gson.TypeAdapterFactory
-keep class * implements com.google.gson.JsonSerializer
-keep class * implements com.google.gson.JsonDeserializer

# Prevent R8 from leaving Data object members always null
-keepclassmembers,allowobfuscation class * {
  @com.google.gson.annotations.SerializedName <fields>;
}

##---------------End: proguard configuration for Gson  ----------


Android Library Project 로 consumer-proguard 를 추가했더라면, 상황이 달라질 수 있겠지만, Gson jar 파일로만 배포합니다.

어쨋거나, 위의 예제 프로젝트를 참고하여, proguard 파일에 똑같이 추가해주어야 별문제가 없을 것 같습니다.

그럼에도 여기서 가장 중요한 것은 아래 라인입니다.

저 부분에 Person 에 해당하는 class 파일(즉, 직접 추가한 클래스)을 넣어 주어야 합니다.

그래야, 위에서 얘기한 것처럼 난독화 할 때, name -> a 로 바뀌는 문제를 방지할 수 있습니다.


-keep class com.google.gson.examples.android.model.** { <fields>; }
# -keep class com.example.Person { <fields>; }


이 글은 Android AlertDialog 를 style.xml 로 얼마나 어디까지 변경시킬 수 있는가를 알아볼 수 있는 글입니다.

코드는 여기를 참고하시면 됩니다.

androidx.appcompat:appcompat:1.1.0 을 사용했습니다.


// :app/build.gradle

dependencies {
...
    implementation 'androidx.appcompat:appcompat:1.1.0'
...
}


Android Studio 를 열고, 새로운 프로젝트 템플릿으로 간단한 안드로이드 앱 프로젝트를 만든 뒤, 아래와 같은 코드를 MainActivity 에 추가합니다. 그리고, 앱을 실행하면, 그림과 같은 화면이 보여질 것입니다. (다이얼로그의 스트링은 Android Resource 를 사용했습니다. string.xml 파일에 추가하기가 매우 귀찮아서요. --;)


    fun showDialog(){
        AlertDialog.Builder(this)
            .setTitle("Exercise Title")
            .setMessage("Exercise Message")
            .setPositiveButton(android.R.string.yes, null)
            .setNegativeButton(android.R.string.no, null)
            .setNeutralButton(android.R.string.untitled, null)
            .show()        
    }


원문 : Note: Attribute names from the support library do not use the android: prefix. That's used only for attributes from the Android framework.


템플릿에서 생성해주는 코드에는 application theme 로 AppTheme 를 activity theme 로는 AppTheme.NoActionBar 를 자동으로 설정해줍니다.


<!-- AndroidManifest.xml -->
    <application
	...
        android:theme="@style/AppTheme">
        <activity
            android:name=".MainActivity"
            android:label="Main"
            android:theme="@style/AppTheme.NoActionBar">
            <intent-filter>
                <action android:name="android.intent.action.MAIN" />
                <category android:name="android.intent.category.LAUNCHER" />
            </intent-filter>
        </activity>
        <activity android:name=".NextActivity" android:label="Next"/>
    </application>
<!-- src/main/res/values/style.xml -->
    <style name="AppTheme" parent="Theme.AppCompat.Light.DarkActionBar">
        <!-- Customize your theme here. -->
        <item name="colorPrimary">@color/colorPrimary</item>
        <item name="colorPrimaryDark">@color/colorPrimaryDark</item>
        <item name="colorAccent">@color/colorAccent</item>
    </style>

    <style name="AppTheme.NoActionBar">
        <item name="windowActionBar">false</item>
        <item name="windowNoTitle">true</item>    
    </style>
    
<!-- src/main/res/values/color.xml -->    
    <color name="colorPrimary">#6200EE</color>
    <color name="colorPrimaryDark">#3700B3</color>
    <color name="colorAccent">#03DAC5</color>    


기본으로 생성해주는 코드를 실행했을 때의 AlertDialog 의 모습은 아래와 같습니다. OK, Cancel 버튼의 색깔이 AppTheme 에서 설정한 colorAccent 의 값(#03DAC5)입니다.


Android AlertDialog 실행 화면


간단하게 버튼의 색깔을 바꾸는 것은 colorAccent 값을 바꿔 주는 것만으로도 가능합니다. 이를 테면, 아래 코드처럼 activity theme 인 AppTheme.NoActionBar 에 colorAccent 아이템을 추가해주는 것 만으로도 쉽게 변경할 수 있습니다.

<!-- src/main/res/values/style.xml -->
    <style name="AppTheme.NoActionBar">
		...
        <item name="colorAccent">@android:color/holo_green_dark</item>
    </style> 


하지만, 이런 식으로 변경하면, 그림 우 하단의 편지 모양의 색깔도 같이 바뀌어 버립니다.

만약, 이런 색상 변경이 의도된 것이라면 상관없지만, alertDialog 의 색상만 바꾸고자한다면, alertDialogTheme 스타일을 만들어서 별도로 설정해야 합니다.

    <style name="AppTheme.NoActionBar">
        <!--        <item name="colorAccent">@android:color/holo_green_dark</item>-->
        <item name="alertDialogTheme">@style/AppTheme.AlertDialogTheme</item>
    </style>

    <style name="AppTheme.AlertDialogTheme" parent="ThemeOverlay.AppCompat.Dialog.Alert">
        <item name="colorAccent">@android:color/holo_green_dark</item>
    </style>


다이얼로그 테마에 android:textColorPrimary 아이템을 추가해주면, 다이얼로그 타이틀의 색상을 변경할 수 있습니다.

    <style name="AppTheme.AlertDialogTheme" parent="ThemeOverlay.AppCompat.Dialog.Alert">
        <item name="colorAccent">@android:color/holo_green_dark</item>
        <item name="android:textColorPrimary">@android:color/holo_red_dark</item>
    </style>


음... 메시지 색상까지 같이 변경되었습니다. --; 타이틀과 메시지를 각각 다른 색으로 지정하려면, 역시 스타일을 지정해주어야 합니다. 타이틀 스타일은 android:windowTitleStyle 을 사용합니다.

    <style name="AppTheme.AlertDialogTheme" parent="ThemeOverlay.AppCompat.Dialog.Alert">
        <item name="colorAccent">@android:color/holo_green_dark</item>
        <item name="android:textColorPrimary">@android:color/holo_red_dark</item>
        <item name="android:windowTitleStyle">@style/AppTheme.AlertDialogTheme.WindowTitle</item>
    </style>

    <style name="AppTheme.AlertDialogTheme.WindowTitle" parent="RtlOverlay.DialogWindowTitle.AppCompat">
        <item name="android:textColor">@android:color/holo_orange_dark</item>
    </style>


마지막으로 Cancel 만 한 번 바꾸어 보도록 하겠습니다. buttonBarButtonStyle 을 추가하면 되는데, 그러면, 모두 바뀌어 버리니, buttonBarNegativeButtonStyle 스타일만 하나 추가해 봅니다.

    <style name="AppTheme.AlertDialogTheme" parent="ThemeOverlay.AppCompat.Dialog.Alert">
        <item name="colorAccent">@android:color/holo_green_dark</item>
        ...
        <!--        <item name="buttonBarButtonStyle">@style/AppTheme.AlertDialogTheme.Button</item>-->
        <!--        <item name="buttonBarPositiveButtonStyle">@style/AppTheme.AlertDialogTheme.Button</item>-->
        <item name="buttonBarNegativeButtonStyle">@style/AppTheme.AlertDialogTheme.Button</item>
        <!--        <item name="buttonBarNeutralButtonStyle">@style/AppTheme.AlertDialogTheme.Button</item>-->
    </style>

    <style name="AppTheme.AlertDialogTheme.Button" parent="Widget.AppCompat.Button.ButtonBar.AlertDialog">
        <item name="android:textColor">@android:color/holo_purple</item>
    </style>


위에서 말한 모든 값들의 참조가 될 수 있는 것들의 힌트는 appcompat-1.1.0/res/values/values.xml 에 모두 있습니다. 알고보면, abc_alert_dialog_material.xml 레이아웃의 DialogTitle 과 message TextView 의 textColor 는 동일하게 ?android:textColorPrimary 로 설정되어 있다는 것도 확인할 수 있습니다.

<!-- appcompat-1.1.0/res/values/values.xml -->
<style name="Theme.AppCompat.Light.DarkActionBar" parent="Base.Theme.AppCompat.Light.DarkActionBar"/>

<style name="Base.Theme.AppCompat.Light.DarkActionBar" parent="Base.Theme.AppCompat.Light">

<style name="Base.Theme.AppCompat.Light" parent="Base.V7.Theme.AppCompat.Light">

<style name="Base.V7.Theme.AppCompat.Light" parent="Platform.AppCompat.Light">
	...
        <item name="alertDialogTheme">@style/ThemeOverlay.AppCompat.Dialog.Alert</item>
        <item name="alertDialogStyle">@style/AlertDialog.AppCompat.Light</item>
        <item name="alertDialogCenterButtons">false</item>
        <item name="textColorAlertDialogListItem">@color/abc_primary_text_material_light</item>
        <item name="listDividerAlertDialog">@null</item>
	...
</style>

<style name="AlertDialog.AppCompat.Light" parent="Base.AlertDialog.AppCompat.Light"/>

<style name="Base.AlertDialog.AppCompat.Light" parent="Base.AlertDialog.AppCompat"/>

<style name="Base.AlertDialog.AppCompat" parent="android:Widget">
  <item name="android:layout">@layout/abc_alert_dialog_material</item>
  <item name="listLayout">@layout/abc_select_dialog_material</item>
  <item name="listItemLayout">@layout/select_dialog_item_material</item>
  <item name="multiChoiceItemLayout">@layout/select_dialog_multichoice_material</item>
  <item name="singleChoiceItemLayout">@layout/select_dialog_singlechoice_material</item>
  <item name="buttonIconDimen">@dimen/abc_alert_dialog_button_dimen</item>
</style>


덧붙임.


Android Studio 에서 theme.xml 파일에서 마우스 오버만 해도 관련된 정보들을 상당수 확인할 수 있습니다.


안드로이드 스튜디오에서 parent 속성에 마우스 오버했을 때 나오는 정보 : 속성값이 어떤 style 로 부터 상속된 것인지 상세하게 보여줍니다.